Welcome to Moda Fabrics!
Winter Frost - Snow Bunting
Winter Frost - Snow Bunting
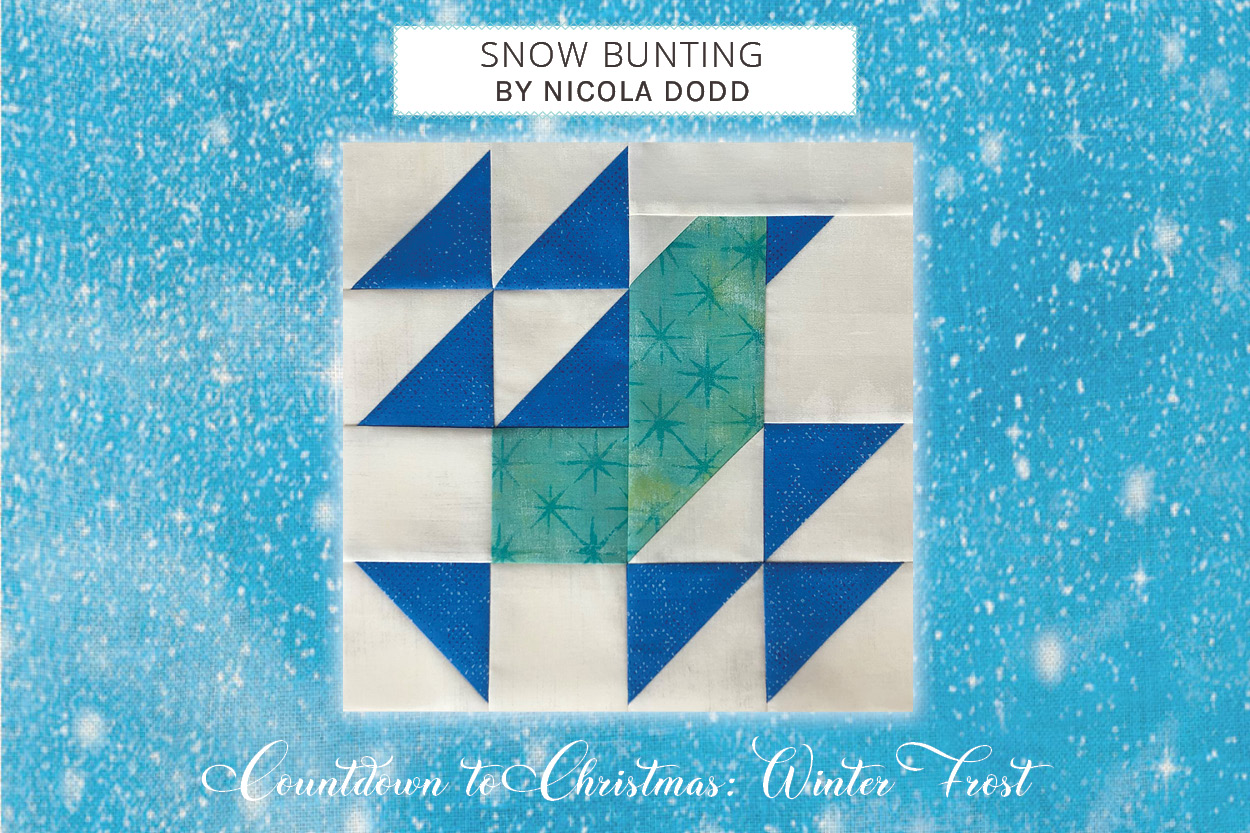
Snow Bunting is one of the block options in the 2020 Countdown to Christmas - Winter Frost. For more info about this quilt-along, check out the Frequently Asked Questions and join our Moda Bake Shop Bakers group. Find all the blocks {here}.
Chef's Notes:
The method used is 4-from-1 half-square triangle units. To make traditional HSTs, cut (4) 4” (for 12” block) or (4) 3” (for 6” block) squares from Fabric 1 and Fabric 2.
YIELD
6" or 12" finished block
INGREDIENTS
6 INCH BLOCK
From fabric 1, cut:
{A} (1) 5” square*
{B} (1) 1¼” x 3½” piece
{C} (1) 2” x 2¾” piece
{D} (3) 2” squares
{E} (1) 1¼” square
From fabric 2, cut:
{A} (1) 5” square*
{E} (1) 1¼” square
From fabric 3, cut:
{D} (1) 2” square
{F} (1) 2” x 4¼” piece
12 INCH BLOCK
From fabric 1, cut:
{A} (1) 8” square*
{B} (1) 2” x 6½” piece
{C} (1) 3½” x 5” piece
{D} (3) 3½” squares
{E} (1) 2” square
From fabric 2, cut:
{A} (1) 8” square*
{E} (1) 2” square
From fabric 3, cut:
{D} (1) 3½” square
{F} (1) 3½” x 8” piece
*NOTE: The method used is 4-from-1 half-square triangle units. To make traditional HSTs, cut (4) 4” (for 12” block) or (4) 3” (for 6” block) squares from Fabric 1 and Fabric 2.
INSTRUCTIONS
STEP 1. MAKE HALF SQUARE TRIANGLES
To make the Half Square Triangles (HSTs), mark both diagonals on the back of an 8” (5”) white square and pin, right sides together, to an 8” (5”) blue square. Stitch a ¼” away from both sides of both lines and then cut the eight units apart as shown. Press the HSTs open towards the blue, and trim all 8 to 3½” (2”) square.

STEP 2. MAKE SNOW BUNTING’S BODY
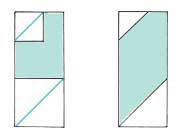
To make the Snow Bunting’s body, mark a diagonal line on a 3½” (2”) white square, pin on the bottom right-hand corner of the 3½” x 8” (2” x 5”) aqua piece, as shown, then stitch on the line, flip ‘open’ and press – to make an Easy Corner Triangle (ECT) – trimming away one or both of the back layers as preferred. Repeat on the top left-hand corner with a 2” (1¼”) white square.
STEP 3. MAKE SNOW BUNTING’S BEAK
To make the beak, make an ECT on the top left-hand corner of the 3½” x 5” (2” x 2¾”) white piece with the 2” (1¼”) blue square. Then add a HST to the bottom, taking care with the placement and pressing as directed (>).

STEP 4. MAKE SNOW BUNTING’S WING
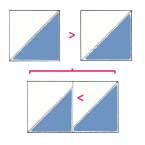
To make the wing, join 4 HSTs together in two rows of two.
STEP 5. MAKE SNOW BUNTING’S TAIL
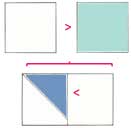
To make the tail, join a 3½” (2”) white square to a 3½” (2”) aqua square. Then join a 3½” (2”) white square to a HST before joining the two rows together.
STEP 6. ASSEMBLE BLOCK
To assemble the block join the remaining pair of HSTs and add to the bottom of the Snow Bunting’s body. Then join the 2” x 6½” (1¼” x 3½”) white piece to the top. Finally join the wing and tail units before adding to the body.
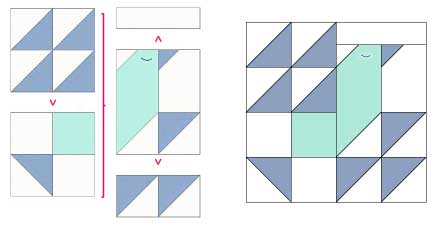
STEP 7.OPTIONAL EMBROIDERY
Embroider the Snow Bunting’s eye if desired.
Your block should measure 12½” (6½”) square unfinished.
Nicola Dodd
If you missed any of the earlier posts -

Comments