Welcome to Moda Fabrics!
Nines in the Middle Jelly Roll Quilt
Nines in the Middle Jelly Roll Quilt
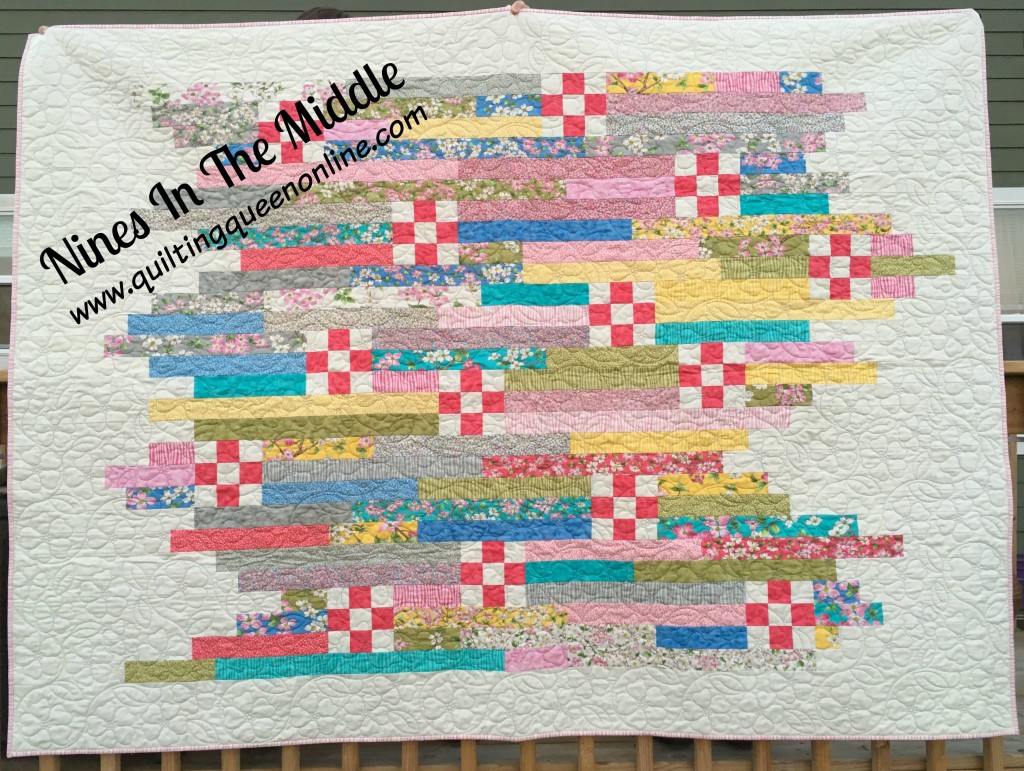
Hey there, I'm so excited to share with you my Nines In The Middle quilt. It's my first time to publish with Moda Bake Shop. Nines In The Middle is a fun and easy quilt using a jelly roll and additional yardage that can easily be completed as a weekend project. I used the Dogwood Trails II jelly roll and coordinating fabrics. Designed, Pieced and Quilted by Doris Rice, The Quilting Queen www.quiltingqueenonline.com
This quilt/project finishes at 68" x 90".
Jelly Roll® {Dogwood Trails II by Sentimental Studios}
2 1/2 yards background fabric
1/2 yard Fabric #1 (for the nine patches)
3/8 yard Fabric #2 (for the nine patches)
6 yards backing fabric
5/8 yards binding fabric
Cutting: (Always cut longest or largest piece first) (WOF indicates Width of Fabric)
Background Fabric
5 – 6 ½” x WOF strips
21 – 2 ½” x WOF strips
Sub cut into the following:
Strip # 1 – 26 ½”, 14 ½” Strip # 2 – 24 ½” , 16 ½”
Strip # 3 – 24 ½”, 16 ½” Strip # 4 – 22 ½”, 18 ½”
Strip # 5 – 20 1/2", 20 ½” Strip # 6 – 20 ½”, 20 ½”
Strip # 7 – 20 ½”, 18 ½” Strip # 8 – 18 ½”, 18 ½”, 4 ½”
Strip # 9 – 18 ½”, 14 ½”, 8 ½” Strip #10 – 18 ½”, 14 ½”, 8 ½”
Strip #11 – 16 ½”, 16 ½”, 8 ½” Strip #12 – 16 ½”, 16 ½”, 8 ½”
Strip #13 – 16 ½”, 14 ½”, 10 ½” Strip #14 – 16 ½”, 14 ½”, 10 ½”
Strip #15 – 16 ½”, 14 ½”, 10 ½” Strip #16 – 16 ½”, 14 ½”, 10 ½”
Strip #17 – 16 ½”, 12 ½”, 12 ½” Strip #18 – 16 ½”, 12 ½”, 12 ½”
Strip #19 – 12 ½”, 12 ½”, 12 ½” Strip #20 – 12 ½”, 10 ½”, 10 ½”
Strip #21 – 10 ½”, 10 ½”
Jelly Roll (2 ½” strips x WOF) Note: A jelly roll contains 40 strips 2 ½” x WOF. You will only need 37. Pull out 3 strips that are closest in color to your 9 patch units you will make with fabric #1 and 2 and set these 3 strips aside to use in another quilt or add to your stash.
Sub cut each strip into the following:
Tip: As you cut them, label the size and stack same size strips together in one stack.
Strip #1 – 26 ½”, 14 ½” Strip #2 – 26 ½”, 14 ½”
Strip #3 – 26 ½”, 14 ½” Strip #4 – 26 ½”, 14 ½”
Strip #5 – 24 ½”, 16 ½” Strip #6 – 24 ½”, 16 ½”
Strip #7 – 24 ½”, 16 ½” Strip #8 – 24 ½”, 16 ½”
Strip #9 – 24 ½”, 16 ½” Strip #10 – 22 ½”, 18 ½”
Strip #11 – 22 ½”, 18 ½” Strip #12 – 22 ½”, 18 ½”
Strip #13 – 22 ½”, 18 ½” Strip #14 – 22 ½”, 18 ½”
Strip #15 – 22 ½”, 18 ½” Strip #16 – 22 ½”, 18 ½”
Strip #17 – 22 ½”, 18 ½” Strip #18 – 20 ½”, 20 ½”
Strip #19 – 20 ½”, 20 ½” Strip #20 – 20 ½”, 20 ½”
Strip #21 – 20 ½”, 20 ½” Strip #22 – 18 ½”, 16 ½”, 6 ½”
Strip #23 – 16 ½”, 16 ½”, 8 ½” Strip #24 – 16 ½”, 16 ½”, 8 ½”
Strip #25 – 16 ½”, 16 ½”, 8 ½” Strip #26 – 16 ½”, 14 ½”, 10 ½”
Strip #27 – 14 ½”, 14 ½”, 12 ½” Strip #28 – 14 ½”, 14 ½”, 12 ½”
Strip #29 – 14 ½”, 14 ½”, 12 ½”
Strip #30 – 12 ½”, 12 ½”, 12 ½”, 2 ½”
Strip #31 – 10 ½”, 10 ½”, 10 ½”, 8 ½”
Strip #32 – 10 ½”, 10 ½”, 10 ½”, 8 ½”
Strip #33 - 10 ½”, 10 ½”, 10 ½”, 8 ½”
Strip #34 – 10 ½”, 10 ½”, 8 ½”, 8 ½”
Strip #35 – 8 ½”, 8 ½”, 6 ½”, 6 ½”, 6 ½”, 4 ½”
Strip #36 – 6 ½”, 6 ½”, 6 ½”, 6 ½”, 6 ½” 6 ½”
Strip #37 – 6 ½”, 6 ½”, 4 ½, 4 ½”, 4 ½”, 4 ½”, 4 ½”, 4 ½”
Fabric #1 - 5 – 2 ½” x WOF
Fabric #2 – 4 – 2 ½” x WOF
Binding: 8 – 2 ½” x WOF strips
Assembly: Note: all seam allowances are ¼”
Making the 9 patch units:
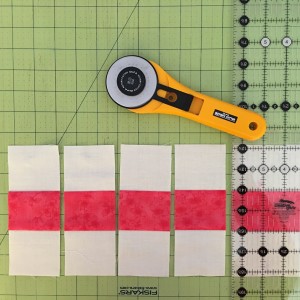
Sew a strip set together in the following order using ¼” seam allowance and right sides together. Fabric #1, Fabric #2, Fabric #1. The strip set should measure 6 ½” across by the WOF.
Press seams to Fabric #1. Make 2 sets of these strips sets.
Sub cut them into 2 ½” x 6 ½” units. You will need 28 of these. Label these 9P – A. You should be able to cut 16 units from each strip set. You will only need 28.
Sew another strip set together in the following order, right sides together. Fabric #2, Fabric #1, Fabric #2.
Press seams to Fabric #1.
Sub cut them into 2 ½” x 6 ½” units. You will need 14 of these. Label them 9P- B.
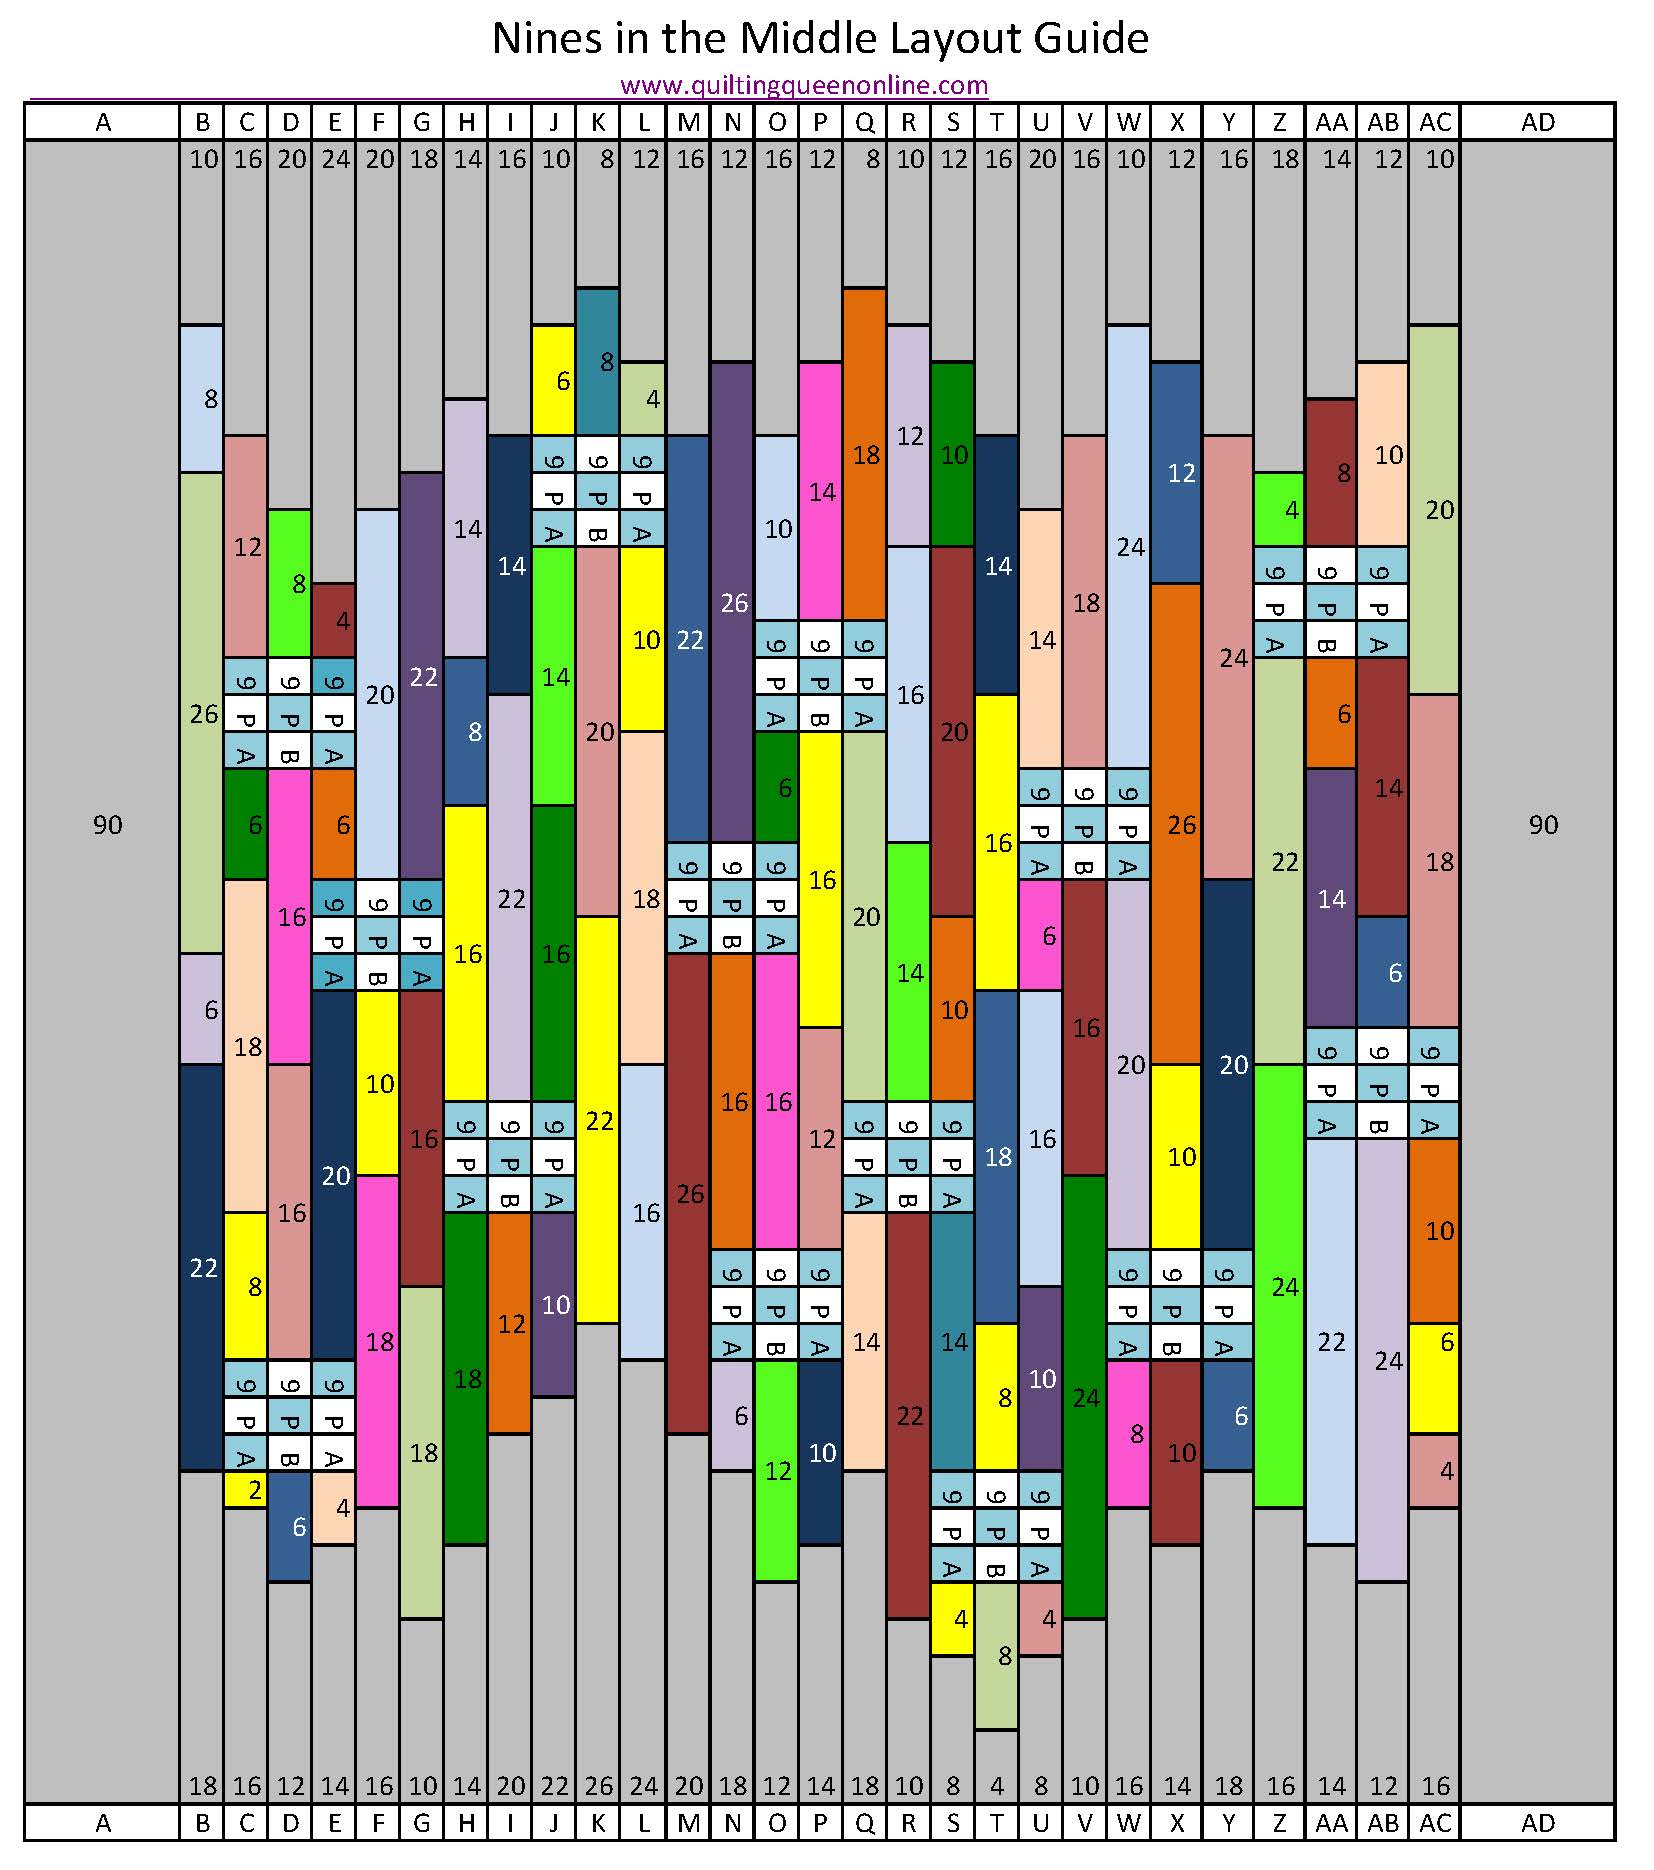
Using the Layout Guide provided, assemble the strips into 28 columns. For best results, randomly choose strips to vary color placement of strips in the quilt.
Nines in the Middle Layout Guide
Tip: I gathered the needed pieces for each column and labeled them with the appropriate column number before I began sewing anything together.
Label each column for ease in assembly of the quilt top once all columns are sewn together.
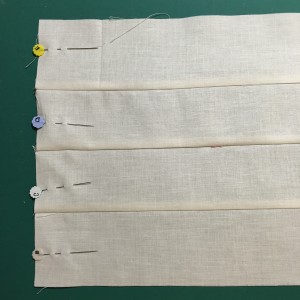
Press seams of even number columns down and press seams of odd number columns up. Sew the columns together to make the quilt top. Press column seams to one direction.
Tip: When sewing column strips together for the quilt top, alternate the direction you sew the columns together. For example sew column 1 and 2 together starting at the top. Sew column 3 to column 1 and 2 starting at the bottom. Now sew column 4 to the unit starting at the top again. Proceed with the alternation until all columns are sewn together. This will help prevent a “skewed” quilt top.
This quilt finishes at 68" x 90"
Once the cutting is complete, you're on the homestretch. The Layout Guide can look intimidating but just take each column one at a time and before you know it you will have all the columns assembled and ready to set together in a quilt. I'd love to see your Nines in the Middle quilt. Be sure to send me a picture ([email protected]) or post one on my FaceBook page.
Doris Rice
{www.quiltingqueenonline.com}


